With the London 2012 Olympics opening ceremony happening on Friday (finally!), a lot of people have been asking me if I'll be doing some Olympic themed nails.
So I couldn't disappoint... my original thoughts were to do flags of each nail but most suggestions have been for the Olympic rings. So, I decided to hold the flags for when the games are in full swing and instead of doing a straightforward ring on each nail I opted for something a little more 'designed'...
Here's how...
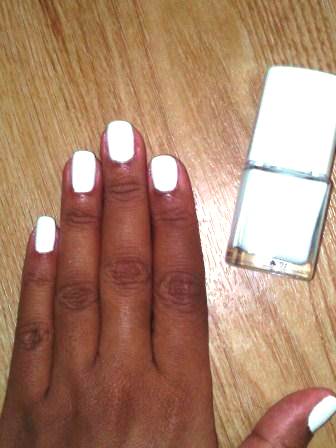
Follow the usual mantra... file and base coat! Then cover all nails with two coats of white nail polish, allowing to dry between each coat. I used Models Own Pro Limited Edition in French White.
 |
| Step 1 - all over white on both hands |
Then using a gold colour, create circular shapes on the edges of each nail... giving each nail a different shape. I used Nail Polish by H&M in Golden Treasure. This is to give each Olympic ring a metallic shadow! If the brush is too thick then use an old make-up brush cutting down the bristles to make a thin brush.
 |
| Step 2 - create gold rings |
Repeat the process on the other hand, mixing up the shapes.
 |
| Step 3 - create gold rings on the other hand |
Once this has dried, layer each ring with one of the colours of the Olympic rings keeping to the order - blue, yellow, black, green and red from left to right. I used Models Own Nail Art Pens for the yellow, blue and black rings. The red is Nails Inc in Milan and for the green I had to do a custom mix, combining Ruby & Millie Nail Colour in Green 720C and Fearne Nail polish in Lime Green.
This is a a great way of creating a specific colour/shade not in your collection... add a few drops of two colours onto an sheet of plastic and mix to create the desired colour. Just like painting class in primary school!
 |
| Step 4 - add colours to the rings |
Repeat of the other hand and if necessary go over each line again to make them really pop
 |
| Step 5 - repeat on other hand |
Add a high shine quick dry top coat, using single strokes to avoid colours bleeding. Clean up the edges with a acetone soaked cotton bud and there you have it! Go Team GB!
 |
| The kit |
Happy painting... the nailist xxx


No comments:
Post a Comment