Showing posts with label Ruby and Millie. Show all posts

Sunday, 23 December 2012

Christmas nail art overload!

So it's almost the night before Christmas and up til now I haven't done any Christmas inspired nails. I've had a few designs in mind but for one reason or another haven't had time to do them. So tonight it's a Christmas nail art overload! 
It will take me ages to go through how I did each nail so I won't go there, but here's which polishes I used...

Rudolph thumb
Base colour - No7 Stay Perfect limited edition in Sultry Sands
Face - Essie Nail Colour in Lady Godiva
Eyes - 17 Lasting Fix in Mini Skirt (from limited edition Best of British nail art kit) and Models Own nail art pen in black
Nose - 17 Fast Finish in Knockout Red (from limited edition Best of British nail art kit)

Christmas tree index finger
Base colour - No7 Stay Perfect limited edition in Sultry Sands
Tree - one coat of Ruby and Millie Nail Color in Green 720C followed by a coat of Bad Apple in Green Bramley
Tinsel - 17 Fast Finish in Knockout Red (from limited edition Best of British nail art kit) with dots using a No7 nail art pen in silver
A silver nail art diamante for the star on top!

Santa suit middle finger
Base colour - 17 High Gloss in Risky Red
Fur trim - 17 Lasting Fix in Mini Skirt (from limited edition Best of British nail art kit)
Belt & buttons - Models Own nail art pen in black

Christmas pudding ring finger
Base colour - No7 Stay Perfect limited edition in Sultry Sands
Christmas pud - Essie Nail Colour in Lady Godiva
Icing - 17 Lasting Fix in Mini Skirt (from limited edition Best of British nail art kit)
Berries  - 17 Fast Finish in Knockout Red (from limited edition Best of British nail art kit)
Holly leaf - Ruby and Millie Nail Color in Green 720C

Gift little finger
Base colour - Barry M  Nail Paint Instant Effects in Gold Foil
Ribbon & bow - 17 Fast Finish in Knockout Red (from limited edition Best of British nail art kit)

My particular favourite is Rudolph!

Then I've just mixed up the designs on the right hand...
Right I'm going to eat my body weight in mince pies!

Merry Christmas and happy painting... the nailist xxx

Sunday, 30 September 2012

Viva Las Vegas!

Today is a second stab at a Vegas design for Chelsea. Trying to capture the glitz and glam of Vegas with some nail art detail. There's three different type of nails which can be worn as is or used on every single nail. I've tred to mix it up a bit as my last attempt was OTT nail art detail. Hope you like it!...


So step by step.. here goes

Start with the base colour on all nails. The glittered nails have a black base, I used Max Factor Nailfinity in Onyx. The cream is No7 Anniversary Colour in 60's Mini Skirt and the index finger has a deep green to match poker table felt.. I used Ruby & Millie Nail Colour in Green 720C .

Step 1
Once dry, add a glitter polish to the black nails. I've chosen one with lots of different colours, Nail Polish by H&M in Confetti, but you could use a single colour... anything glitzy basically!

Step 2

Now to both index fingers, using a white nail art pen, add a semi circular tip guide line.

Step 3
Then fill the circle in with a white polish such as Barry M in Matt White.

Step 4

While that's drying, use the dotter on a black nail art pen to create the dice pattern on the middle fingers. You can pick whichever numbers you'd like but I think 5 and 6 look more obviously like dice.

Step 5

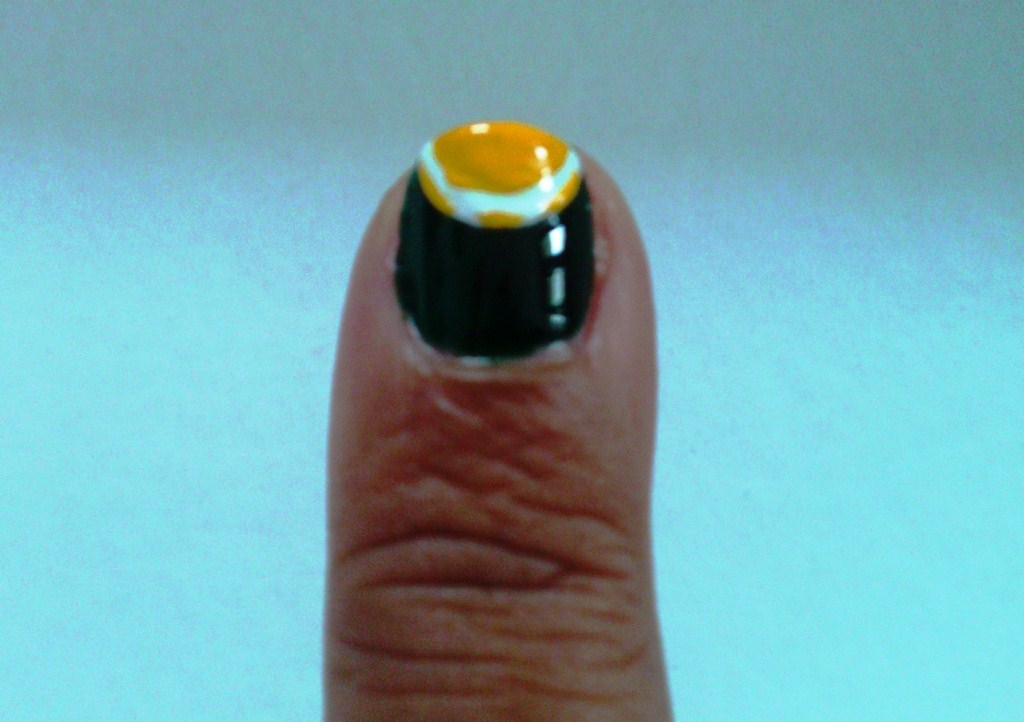
Once the white semi circles have dried you can add the poker chip detail... this is the most difficult part.

Step 6 left
Draw a smaller semi circle using a primary colour, leaving a small white border - it helps to use a nail art pen or small brush for accuracy. Then add detail to the white border creating a broken line of two long dashes and one shorter dash in the middle.

Step 6 right
Then finally add the top have of the chip value numbers. Pick whatever numbers you find easiest to draw.

Step 7
If needs be, add a second coat of glitter to the black nails, then finish off with a a quick dry top coat to all nails. Viva Las Vegas!

Happy painting... the nailist xxx


Sunday, 19 August 2012

Cupcake dreams

So one of my many dreams (I'm a bit of an idealistic dreamer!) is to one day own a cupcake cafebar, famous for the best cupcakes in town which you can buy to take away or sit in an enjoy with a cocktail. There would of course be somewhere to get your nails done while sipping your cocktail. I imagine the decor will be retro glam - think American diner meets Breakfast at Tiffany's! Well, one day maybe... In the meantime the dream has inspired my latest design, 'Cupcake Dream's, and here's the how to.

(By the way, it would be really good to hear your thoughts on my blog. I know I have some followers via facebook but it would be great to get your comments and following on the actual blog)
This is a bit of a complex one so here goes...

Step 1  - Base colours
After a good base coat to avoid staining, apply a light pink to eight nails and lavender colour to one nail on each hand - choose a different nail on each hand. I used Bourjois So Laque Ultra Shine in Rose Satin for the pink and Prevail Nail Lacquer in Lush Lounge for the lavender.

Once dry, using a white nail art pen such as Models Own Nail Art Pen in white draw a deep semi circle on the lavender nails

Step 2 - Outline semi circle
Then fill in the top half of the semi circle with one coat of white - I used Models Own Pro Limited Edition in French White

Step 3 - Fill in outline
Allow the white to dry and then create the cupcake base by adding a pink tip with a 'frilly' base. Just paint across the tip moving the brush in a zigzag motion to give the impression of frosting. I used Models Own in Pastel Pink.

Step 4 - add cupcake base
While that dries, start applying the various designs to different nails. Firstly, I created candy stripes using a thin brush and Bourjois One Second Texture Silcone Gel Nail Enamel in Rose Cupcake (apt name!)

Step 5 - Candy stripes
On another nail I did a 'hundreds and thousand' style design adding random small dots of various pastel colours, just using the corner edge of each brush. My selection of colours were Rimmel 60 Seconds 620 'How do you Lilac it', No7 Stay Perfect Nail Colour in Minty Fresh, Nail Paint by Barry M in Lemon Ice Cream, Ruby & Millie Nail Colour in Green 710C and Bourjois One Second Texture Silcone Gel Nail Enamel in Rose Cupcake.
Step 6 - Hundreds and thousands
On my little fingernail I created a simple white polka dot design using the dotter on the Models Own white nail art pen.

Step 7 - polka dots
Now, going back to the cupcake fingers apply vertical stripes to define the cupcake case. I used a Models Own Nail Art Pen in Pink.

Step 8 - Define cupcake base
On the last nail add a wide tip using the lavender base colour of the cupcake nail

Step 9 - Lavender tip
Now back to the cupcake finger, using the colours used on the 'hundreds and thousands' nail add some small random flecks to the white part of the cupcake and a bejewelled cherry on top. I used a pink rhinestone from an assortment pack, Broadway Nails Fashion Diva 3D Art Deluxe Nail & Body Art Kit. The best way to apply these is to add a dot of clear top coat to the nail and then using a toothpick, deep the end in some clear top coat, pick up the rhinestone and dot it on.

Step 10 - Finishing touches to cupcake
Add a shiny top coat to all nails and there you have it... nails good enough to eat (not literally!)!
Here's a shot of the other hand...

and here's the kit

The kit


Happy painting...the nailist xxx