Showing posts with label Models Own. Show all posts

Saturday, 16 March 2013

Neon half moons

Oh what a horrid rainy day it is in the UK. So I thought I'd post some summery neon nails to cheer myself up. Come on sunshine!
This neon is one of my favourite polishes! I started with a base of Models Own Pro in French White all over the nail. Then the neon, which is Models Own in Pink Punch, over the top, leaving a half moon gap at the base of each nail. And then as an afterthought, I added the defining black line using a Models Own nail art pen. So it's a Models Own takeover!

Putting the white underneath the neon makes it even brighter!

Happy painting... the nailist xxx

Tuesday, 12 March 2013

Polish days - Vintage

Well seeing as I've been a bit slow on the posts recently I thought I'd at least make the effort to join in on this month's Polish Days - the blogger event organised by the lovely Polly Polish.

This month's theme is vintage and I decided to pay homage to art deco - I've always loved a bit of Rennie Mackintosh!

This is two coats of Revlon Top Speed in Stormy. The detail is free hand using Models Own in Utopia, Models Own nail art pen in black and No7 nail art pen in silver.

Happy painting... the nailist xxx

Wednesday, 13 February 2013

Be my valentine

Quick post tonight...my cheeky Valentines nails are currently on Boots Facebook page! They seem to have split the vote - some people loving them but others seem to think I have crusty hands, lol! Best get myself to Boots for some hand cream!
This is two coats of Models Own Pro in French White Tip. Followed by a free hand painted design using Models Own Nail Art Pen for the black and Bourjois 10 day anti-chip in shade 20 for the red.

Happy Valentines everyone! Right, best go and get scrubbing these crusty hands of mine! Feel free to comment and share the Boots FB post if you disagree

Happy painting... the nailist xxx

Tuesday, 5 February 2013

Polish days - Get back to nature

It's Polish day time again - the monthly blogger event set up but the lovely Polly Polish. I, unfortunately, missed last months' in the haze of post Christmas back to reality, so even though I'm currently overseas with work I made sure I did a design ready to post. The theme is 'back to nature' so pretty broad and I had a vision of a daisy chain but it didn't quite work out like that in the limited time I had before my trip, but it certainly still fits the brief...

So just a quick run down of the polishes used... the base blue is one coat of H&M Nail colour in Blue my Mind. Then using a striping brush I added the grass using Bad Apple in Green Apple. Then added the flower detail using Models Own nail art pens in white and yellow.

All finished off with a generous coat of Save the Nail 45 second top coat.

And as we're talking about nature I thought I'd share the beautiful sunset here in the Caribbean...


Happy painting... the nailist xxx


Tuesday, 29 January 2013

Funky matte french

So I'm not a huge lover of matte top coats - often finding they just make you look like you've scratched the sheen of a nice glossy polish. But I think it all depends what colour you're top coating and also the quality of the top coat. I've found one I really love from Models Own Pro which gives a lovely satin finish rather than dull matte.

This twist on the classic french manicure is two coats of Essie Nail Lacquer in Fancy Pants, followed by a free hand striking fuchsia tip using Models Own in Purple Passion (I personally think it's more pink than purple!). Finished off with the Models Own Pro Matte top coat. You can't really tell from the photo but the finish is a lovely muted sheen rather than being completely dull matte.

I think the colour combo works really well. The key is to use a muted sophisticated colour for the base and then a colour that really pops for the tip. It's a great way to venture into nail art or to take a boring work mani to the next level without being over the top!

Happy painting... the nailist xxx

Monday, 14 January 2013

Dash dash dash

Well I have basically been a bit rubbish with the posts lately - I've got a bit of January inertia! I plan to make a more concerted effort from now on!

I'm using two new polishes in today's post. I went on a bit of spree before Christmas so have quite a few to try.
The base blue is from a RCH Style Society gift set in the Boots Christmas range. After two coats of that had dried, I applied a horizontal brush width stripe on each nail using Essie Nail Lacquer in Fancy Pants (love this name!). Any wonky lines I just straightened up with some more of the blue.

The I simply added some pink and white dashes using Models Own nail art pens.

This is one of the designs that there's no need to worry about being exact as the overall effect is what you're after.

I finished it all off with a coat of Save the Nail 45 Second Top Coat to make it all nice and shiny!

Happy Painting.. the nailist xxx

Sunday, 23 December 2012

Christmas nail art overload!

So it's almost the night before Christmas and up til now I haven't done any Christmas inspired nails. I've had a few designs in mind but for one reason or another haven't had time to do them. So tonight it's a Christmas nail art overload! 
It will take me ages to go through how I did each nail so I won't go there, but here's which polishes I used...

Rudolph thumb
Base colour - No7 Stay Perfect limited edition in Sultry Sands
Face - Essie Nail Colour in Lady Godiva
Eyes - 17 Lasting Fix in Mini Skirt (from limited edition Best of British nail art kit) and Models Own nail art pen in black
Nose - 17 Fast Finish in Knockout Red (from limited edition Best of British nail art kit)

Christmas tree index finger
Base colour - No7 Stay Perfect limited edition in Sultry Sands
Tree - one coat of Ruby and Millie Nail Color in Green 720C followed by a coat of Bad Apple in Green Bramley
Tinsel - 17 Fast Finish in Knockout Red (from limited edition Best of British nail art kit) with dots using a No7 nail art pen in silver
A silver nail art diamante for the star on top!

Santa suit middle finger
Base colour - 17 High Gloss in Risky Red
Fur trim - 17 Lasting Fix in Mini Skirt (from limited edition Best of British nail art kit)
Belt & buttons - Models Own nail art pen in black

Christmas pudding ring finger
Base colour - No7 Stay Perfect limited edition in Sultry Sands
Christmas pud - Essie Nail Colour in Lady Godiva
Icing - 17 Lasting Fix in Mini Skirt (from limited edition Best of British nail art kit)
Berries  - 17 Fast Finish in Knockout Red (from limited edition Best of British nail art kit)
Holly leaf - Ruby and Millie Nail Color in Green 720C

Gift little finger
Base colour - Barry M  Nail Paint Instant Effects in Gold Foil
Ribbon & bow - 17 Fast Finish in Knockout Red (from limited edition Best of British nail art kit)

My particular favourite is Rudolph!

Then I've just mixed up the designs on the right hand...
Right I'm going to eat my body weight in mince pies!

Merry Christmas and happy painting... the nailist xxx

Monday, 17 December 2012

80s disco ball

Very quick post tonight as I'm mid gift wrapping and general Christmas business!

I absolutely love this glitter polish - and the W7 brand in general... they have such a wide and usual variety of shades and, although on the budget end of the market, they're great quality. Nail Polish Direct have a good selection.
The glitter polish is two coats of W7 in Moondust (I even love the name!). Then, as the glitter reminded my of a disco glitter ball, I added an 80s inspired zig zag line. First, a single line using a Models Own nail art pen in black. Then, a line either side of the black using Andrea Fulerton Nail Boutique dot & flick pen in pink.

Here's my right hand...
All finished off with a coat of W7 top coat.

Happy painting... the nailist xxx

Friday, 7 December 2012

Python skin

This design is probably more appropriate for Halloween seeing as it looks like my nails are haemorrhaging! But I thought I'd share anyway as I love how well this crackle effect cracks...
This is two coats of Models Own in Utopia followed by Bourjois Top Coat Python in unnamed red shade. Finished off with a Save the Nail 45 second top coat.

Might go and get myself a different colour!

Happy painting... the nailist xxx

Sunday, 2 December 2012

Peekaboo leopard print

I actually did these nails on Monday but just haven't had a chance to post. So I'll miss out my usual preamble and get to it...
I've come to realise I have a slight obsession with animal print... the other day I had a pink leopard print top on, a grey leopard print umbrella, a purple leopard print phone cover and these leopard print nails! Eek! Need to be careful I don't tip over into tragic thirty-something.

This design was a Models Own extraganza! The base colour is two coats of Models Own in Mushroom. Once dry I added an angled tip with Models Own in Concrete Mixer. I then free hand painted the leopard print using black and white Models Own nail art pens. Finished off with some Seche Vite quick dry top coat.

Happy painting... the nailist xxx

Wednesday, 21 November 2012

Lucky dip favourites

So as I mentioned on my last post there was a charity nail polish lucky dip at work. I've been working my way through my haul and here's a few of my favourites.

The base grey is Models Own in Mushroom and the two lines are Butter London in Artful Dodger (turquoise) and Dahling (dusky pink). I particularly love the Models Own one - might try it with a matte top coat next time.

I started with the grey all over the nail then free hand added the layers of colour so the top part of my nail has basically got 4 coats of colour. Just make sure you let it dry between coats otherwise it will be too thick to dry.

Finished off with a coat of Save the Nail 45 second top coat.

Happy painting... the nailist xxx

Sunday, 11 November 2012

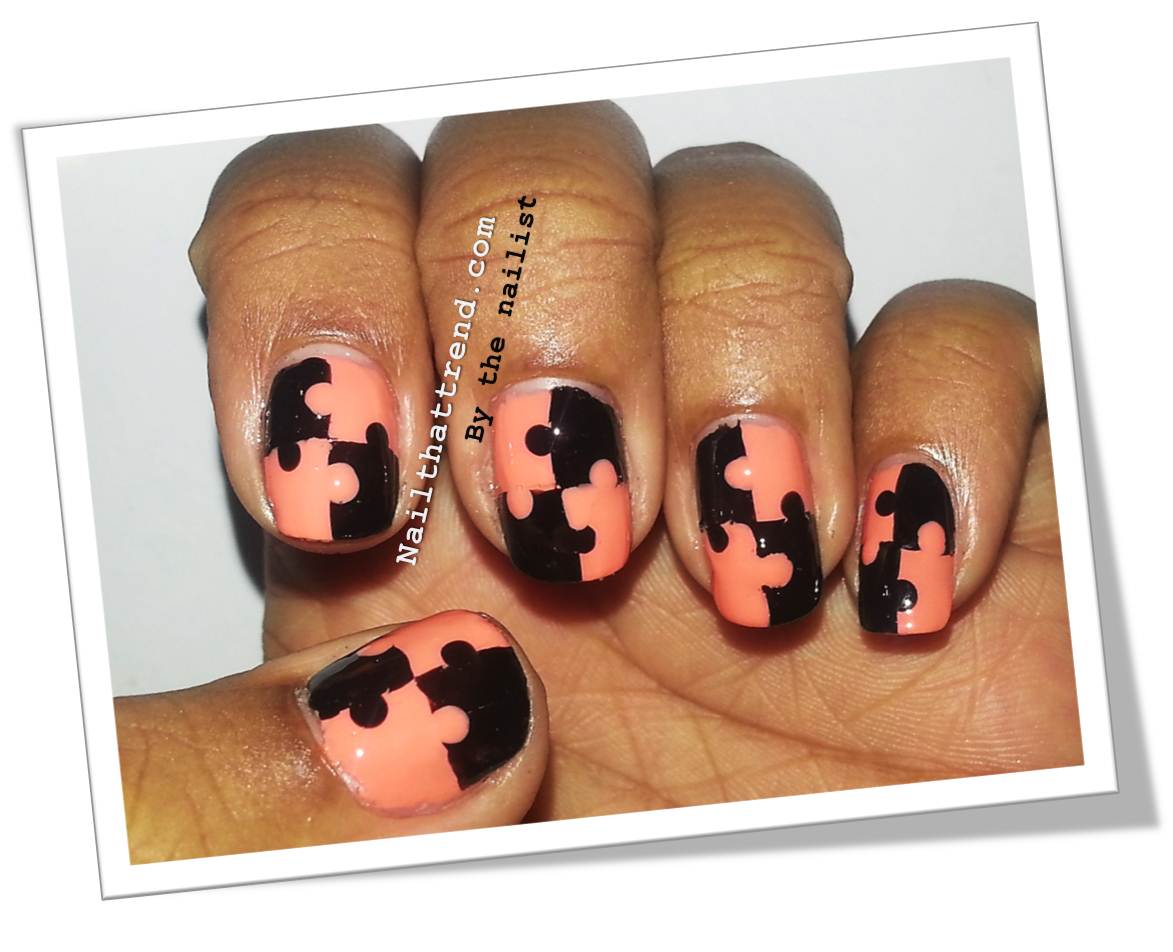
Falling to pieces

Quick post today as I must go to bed at a decent hour. After a lovely weekend visiting the parents and basically eating, I've watched X Factor and have now vowed to get a good night's sleep. However, I know I'm myself as my sister and I are currently addicted to playing scrabble and hangman against each other via Facebook! Seriously, we can't put it down and are ever so slightly obsessed... she's the hangman queen but I usually wipe the floor with her on scrabble. Reading that back we sound like complete losers... I promise you we're actually quite interesting, trendy and cool people... honestly!

Anyway, enough of my rambling.. tonight's post is something I saw on a YouTube tutorial a while a go and have been meaning to try.
I started with a base of Models Own in Fuzzy Peach then free hand painted the black squares with Barry M Nail Paint in Black. If you struggle painting free hand then you can either add some guide lines with a nail art pen or you could try using sellotape to tape off the squares. Just make sure you wait till the base colour is completely dry before taping and then once you've painted the black pull off the tape before it dries.

Then using a dotting tool I simply added dots to create the jigsaw connections. Quite simple really.

Finished off with a coat of Seche Vite quick dry top coat.

Happy painting... the nailist xxx

Tuesday, 6 November 2012

Polish days - MAN-icure

It's Polish Day time!.. the monthly blogger event put together by Hannah @ PollyPolish.com. This month's theme is MAN-icure in honour of it being Movember. The brief was either a the iconic moustache design or a tribute to any special men in your life.

I decided to go literal and simple....

I had a bit of trouble with the moustaches due to a gloopy black nail polish but no time to redo unfortunately! Still loving it though - makes me laugh every time I look at my nails.

And what makes me giggle even more is that if I look at them the other way the moustaches, unintentionally, look like eyebrows and I have angry/surprised faces looking back at me!

I opted for muted 'manly' base colours:-
Thumb - Nail Polish by H&M in Nerd
Index - W7 in 29 Grey
Middle - Models Own in Concrete Mixer
Ring - Bourjois 1 Second Gel Silicone Texture in 04 Taupe Classy
Little - Bourjois 10 days No Chips in shade 23

Happy painting.. the nailist xxx


Saturday, 20 October 2012

Wig Wam Thank You Mam

I've gone all tribal! This is all painted free hand and is meant to be a little bit messy to add to the effect.

I started with the peach base colour - Models Own Nail Polish in Fuzzy Peach. Then some free hand random stripes of green and blue/grey. I used Bourjois 10 day Anti Chip in shade 23 and Bourjois So Laque  Ultra Shine in Bleu Asphalte. And then just start adding lines, dots and flicks with black and white nail art pens.

Finish off with a quick dry top coat after the design is fully dry to avoid colour bleeding.

Happy Painting... the nailist xxx

Thursday, 18 October 2012

Crazy nail polish lady!

Yes this is what I need to be called... despite a recent collection count totaling over the 350 mark, I've been unable to resist the urge to buy more polish! And this time I've gone way over the top  - 15 new ones found their way home with me.. oops! So in order to give my purchase a purpose, more than my obvious craziness and glitter nails being on trend, I thought I'd show a sample of each one for your viewing pleasure... very rough painted, so all over the place and some of the glitters/metallics have been victim to flash glare but it gives you an idea.

Little finger - Bourjois So Laque Ultra Shine in Lime Catwalk (2 coats)
Ring finger - Barry M Nail Paint in Silvery Lilac (2 coats)
Middle finger - Miss Sporty Metallic Flip (2 coats) this actually looks the colour above from one angle then a metallic olive green from another - very cool!
Index finger - Barry M Nail Paint in Pink Sliver Glitter (2 coats)
Thumb - Barry M Nail Paint in Black Multi Glitter (1 coat!) - this looks a million times better in the flesh, the glitter is really multicoloured.

Little finger - 17 Fast Finish in Potion (2 coats)
Ring finger - Barry M Nail Paint in Silver Multi Glitter (3 coats)
Middle finger - Rimmel Precious Stones in 001 Diamond Dust (2 coats) - this looks like really uncrusted diamonds in the flesh
Index finger - 17 Fast Finish in Fury (2 coats)
Thumb - Bourjois 1 Second Texture Gel in 20 Perle Illusion (2 coat)

Little finger - Bourjois So Laque Ultra Shine in Bleu Asphalte (2 coats)
Ring finger -Revlon Nail Polish in 261 Sparkling (4 coats!)
Middle finger - Bourjois 1 Second Texture Gel in 16 Bleu Moonlight (1 coat!)
Index finger - 17 Holo Nail Polish in Silver (2 coats)
Thumb - Models Own Nail Polish in Fuzzy Peach (2 coat)


Happy Painting (and shopping!)... the nailist xxx

Wednesday, 17 October 2012

Unleash your inner pink... take 2!

I wasn't very happy with the last ones so here's a second attempt at a Breast Cancer Awareness Month inspired design... much better I think! What do you think?

Colours used:
Pale pink - Models Own Nail Polish in Pastel Pink
Dark pink - Bourjois 1 Second Nail Polish in Rose Cupcuke
Silver details - No7 nail art pen from a Christmas 2011 gift set

I had to use a striping brush (very thin paint brush) to create the detail in the dark pink

Happy Painting... the nailist xxx

Monday, 15 October 2012

Unleash your inner pink

October is Breast Cancer Awareness month so I'm unleashing my inner pink in support of the campaign!

I started with a one coat base colour of No7 Stay Perfect in Milan, which is gorgeous dense glitter polish... one of my favourites. Then free hand painted the baby pink, which is Models Own Nail Polish in Pastel Pink, over the full nail leaving a slightly curved peek-a-boo triangle at the base. I actually originally added a defining line of bright pink with a Models Own Nail Art Pen but it was too luminous, so I went over the top using a striping brush and Bourjois 10 Days No Chips shade 15 - which is why the lines look a bit like country lanes! Oh well.. it's for charity!

Check out Breast Cancer Care's Pink Friday's fundraising page for ideas of how you can 'Unleash your inner pink'

Happy Painting... the nailist xxx

Tuesday, 2 October 2012

Greyed out

I love grey polishes and W7 Nail Polish in Grey is one of my faves. So using this as a base I've played around with three Models Own nail art pens. The plan was just to have a heart on one finger but as usual I got carried away! Unfortunately, I made a rookie mistake and didn't wait long enough before applying top coat, so I've smeared one of the design .. grrrr!


Happy painting... the nailist xxx

Sunday, 30 September 2012

Viva Las Vegas!

Today is a second stab at a Vegas design for Chelsea. Trying to capture the glitz and glam of Vegas with some nail art detail. There's three different type of nails which can be worn as is or used on every single nail. I've tred to mix it up a bit as my last attempt was OTT nail art detail. Hope you like it!...


So step by step.. here goes

Start with the base colour on all nails. The glittered nails have a black base, I used Max Factor Nailfinity in Onyx. The cream is No7 Anniversary Colour in 60's Mini Skirt and the index finger has a deep green to match poker table felt.. I used Ruby & Millie Nail Colour in Green 720C .

Step 1
Once dry, add a glitter polish to the black nails. I've chosen one with lots of different colours, Nail Polish by H&M in Confetti, but you could use a single colour... anything glitzy basically!

Step 2

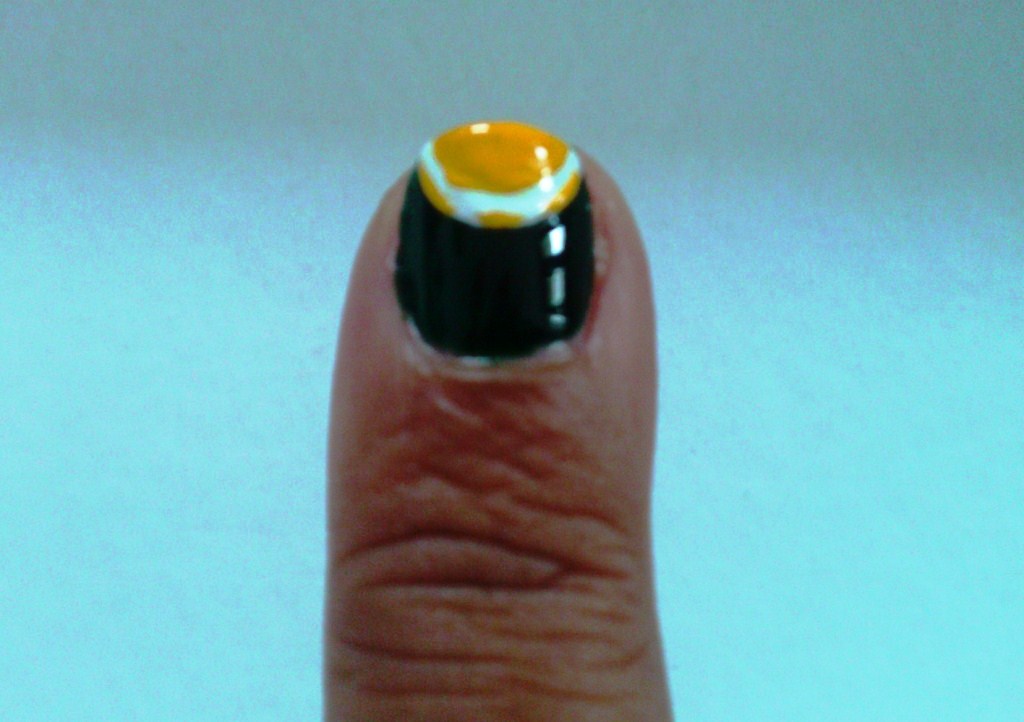
Now to both index fingers, using a white nail art pen, add a semi circular tip guide line.

Step 3
Then fill the circle in with a white polish such as Barry M in Matt White.

Step 4

While that's drying, use the dotter on a black nail art pen to create the dice pattern on the middle fingers. You can pick whichever numbers you'd like but I think 5 and 6 look more obviously like dice.

Step 5

Once the white semi circles have dried you can add the poker chip detail... this is the most difficult part.

Step 6 left
Draw a smaller semi circle using a primary colour, leaving a small white border - it helps to use a nail art pen or small brush for accuracy. Then add detail to the white border creating a broken line of two long dashes and one shorter dash in the middle.

Step 6 right
Then finally add the top have of the chip value numbers. Pick whatever numbers you find easiest to draw.

Step 7
If needs be, add a second coat of glitter to the black nails, then finish off with a a quick dry top coat to all nails. Viva Las Vegas!

Happy painting... the nailist xxx


Friday, 28 September 2012

Eat cake, make money for charity!

Today is Macmillan Cancer Support's 'World's Biggest Coffee Morning'. Donate to a very worthy cause by eating cake... what's not to like?!

That's exactly what I'll be doing while sporting my Macmillan-esque nails!


Base coat: Save the Nail Eau so hydrating
White: Barry M Matt White
Green: W7 Neon Green
Detail: Models Own white & black nail art pens
Top coat: inm Out the Door quick dry


Happy painting (cake eating and coffee drinking!)... the nailist xxx